Ideas

Typography Picker (chosen)

I hate picking typography when designing!!

What I’m imagining:
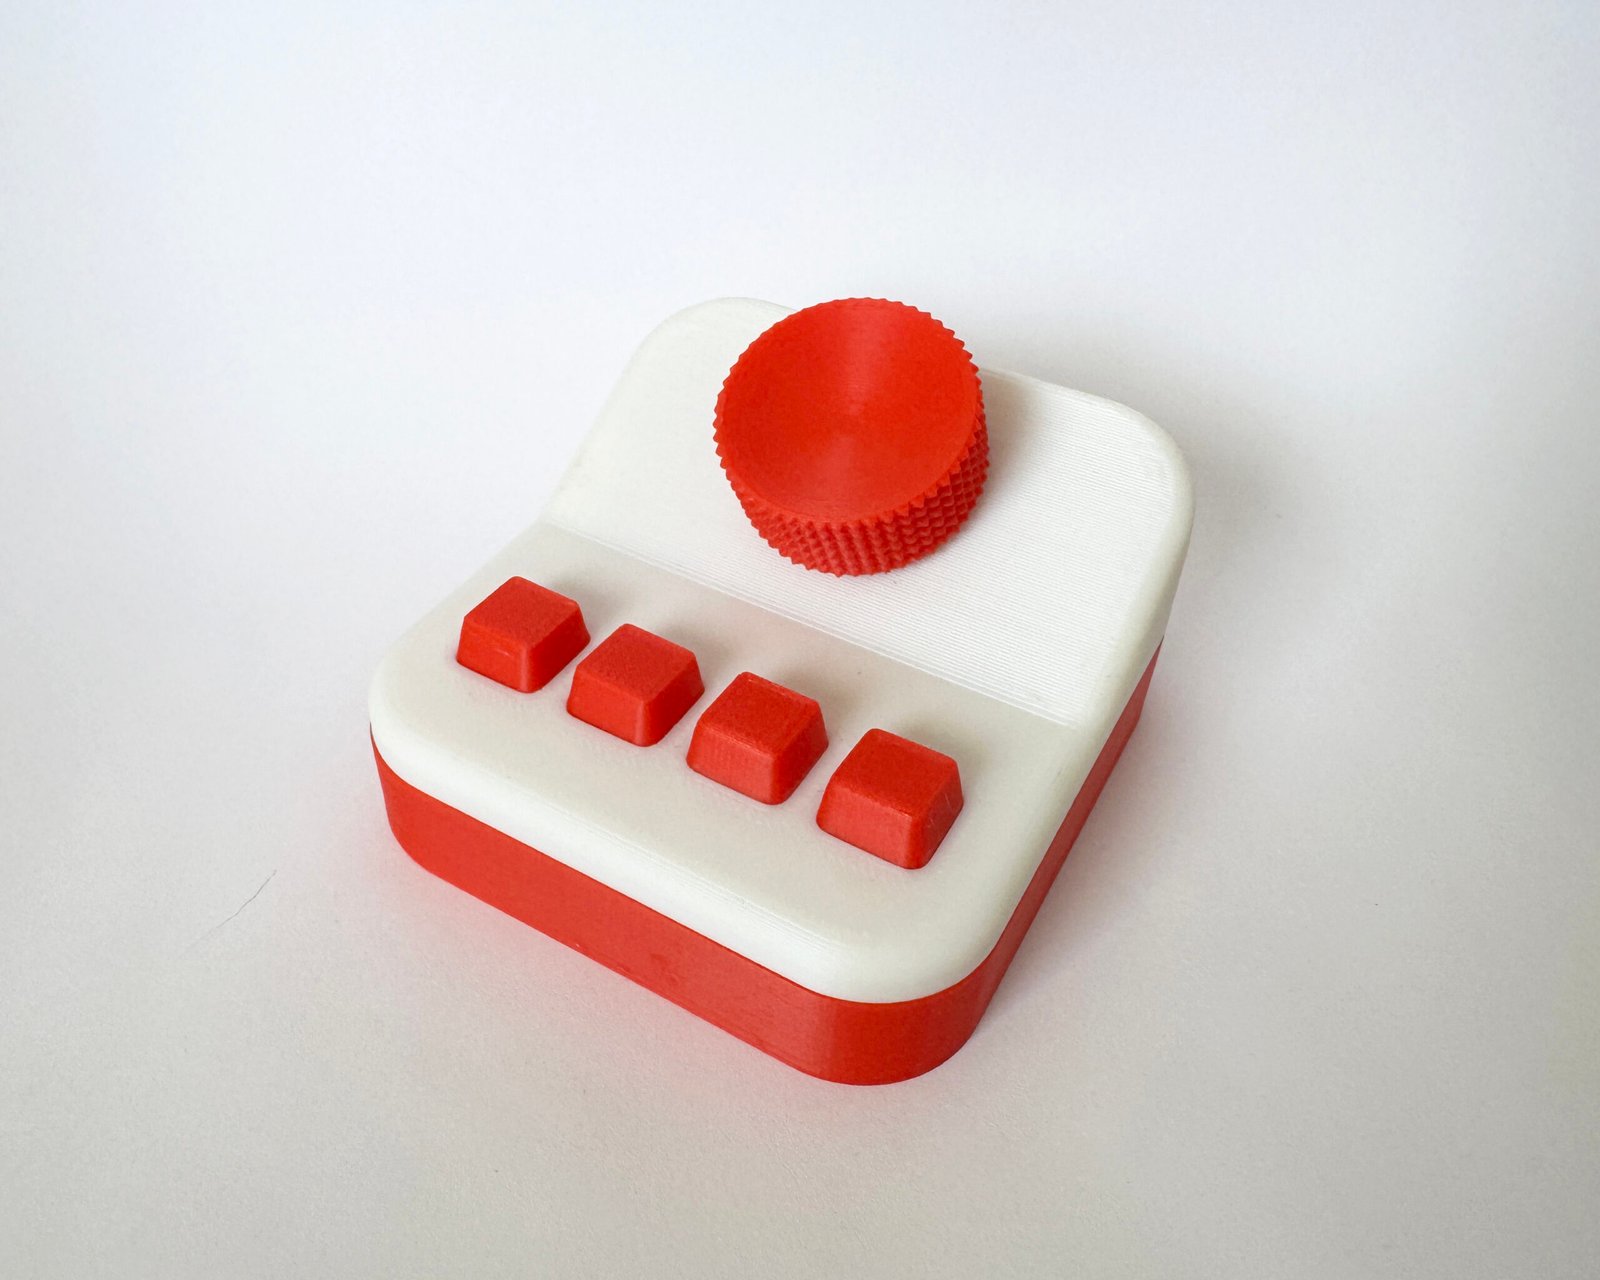
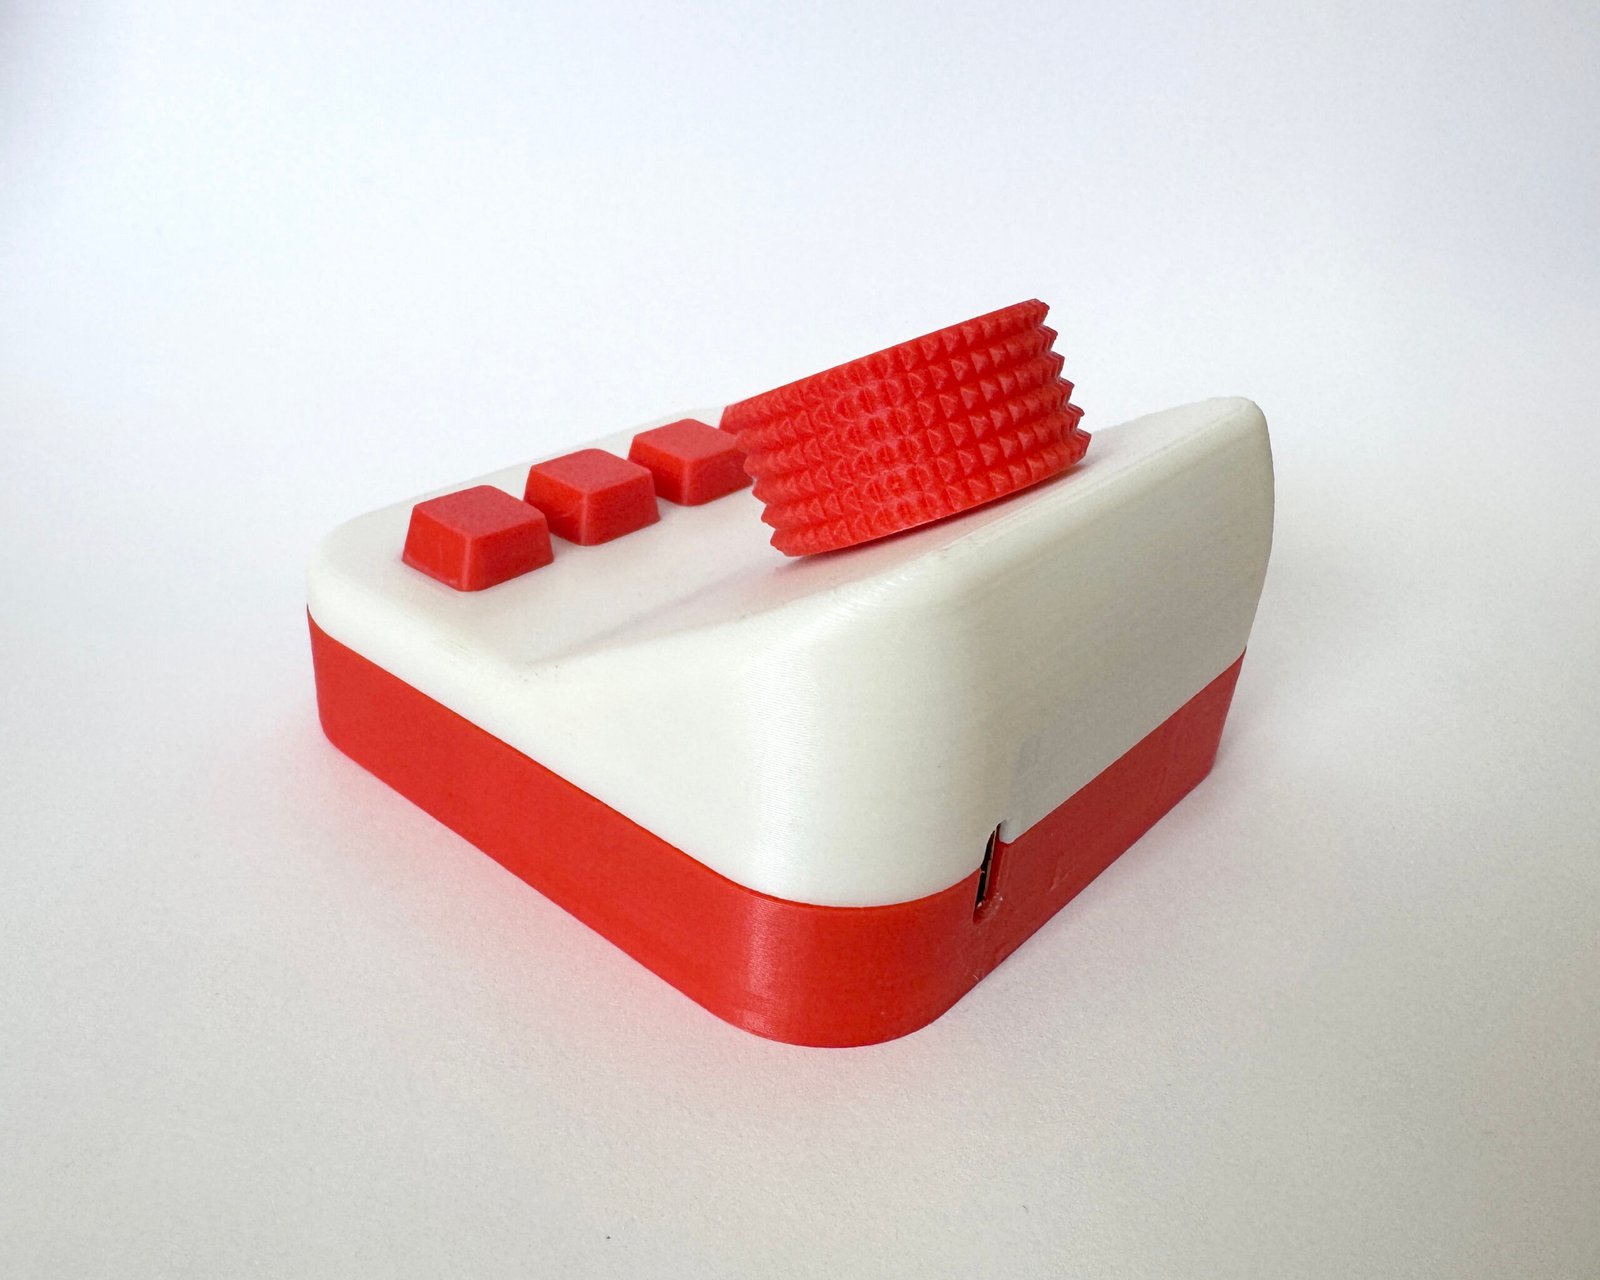
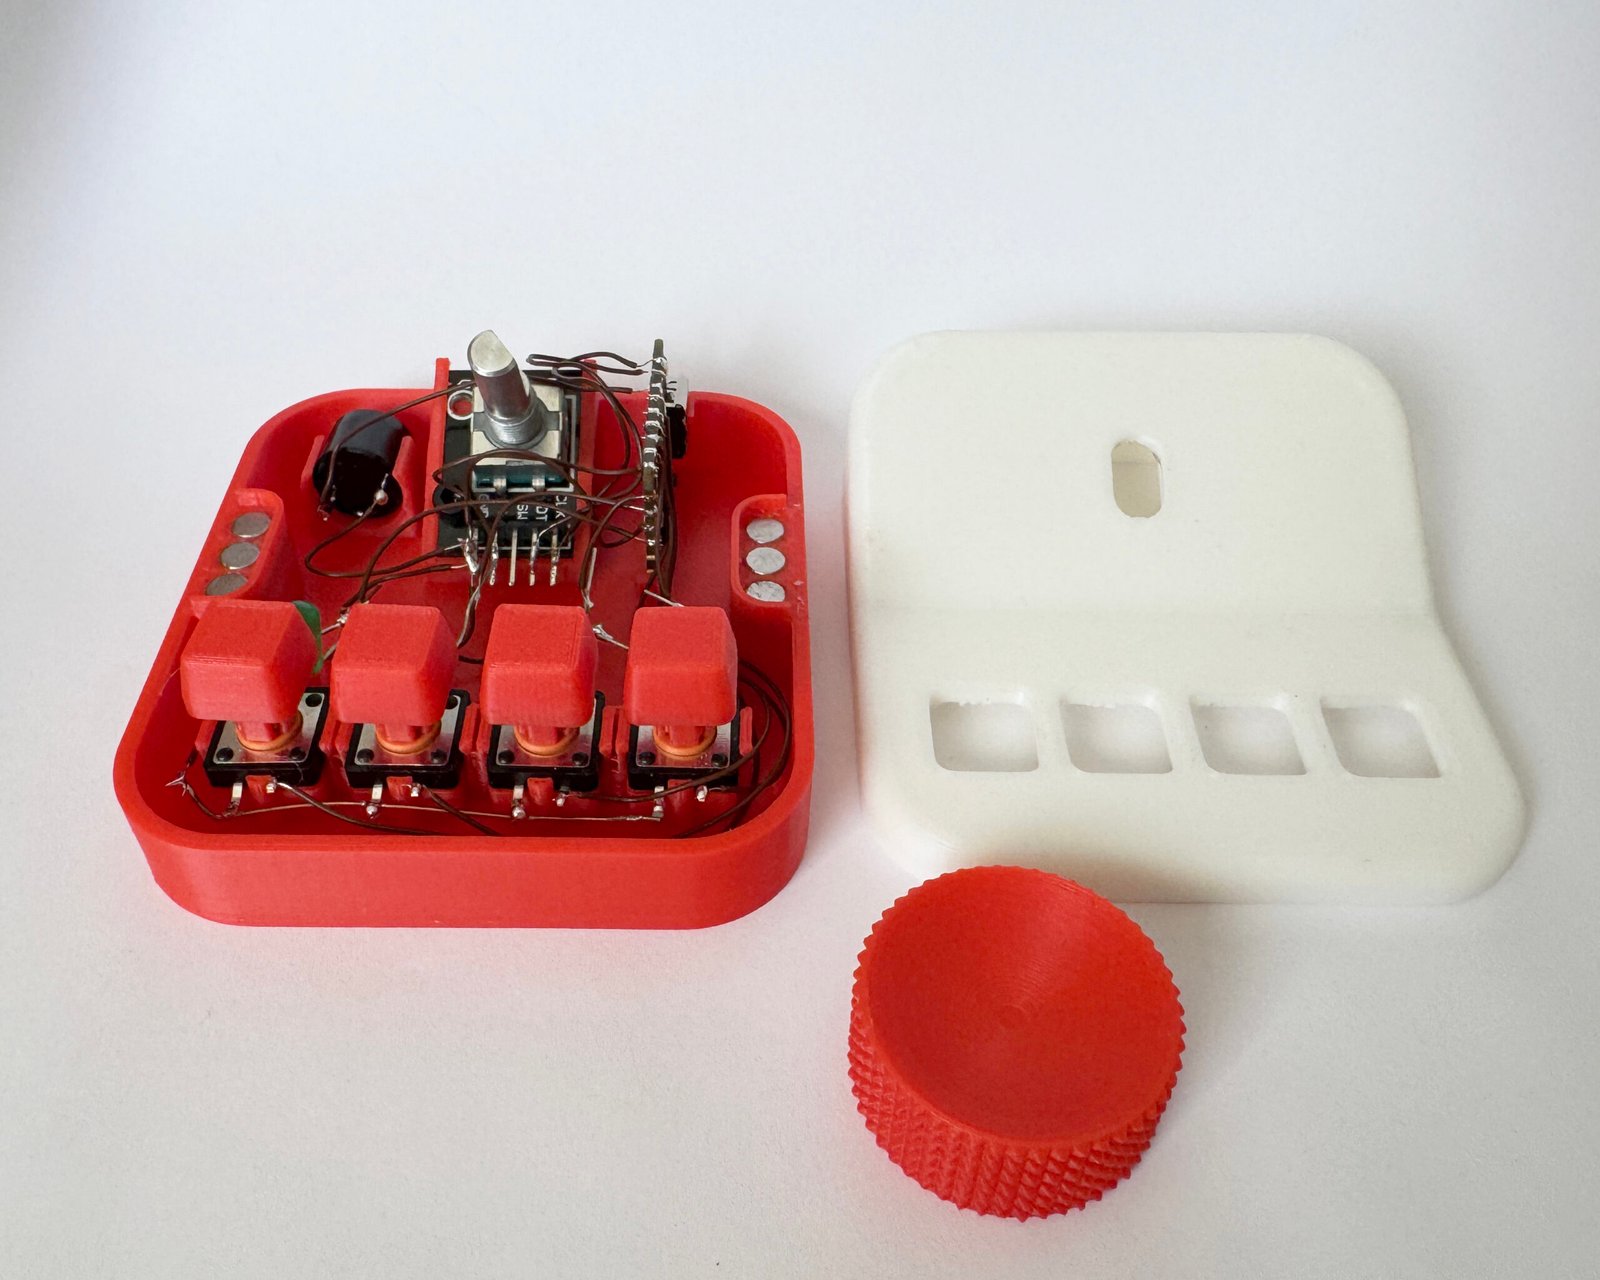
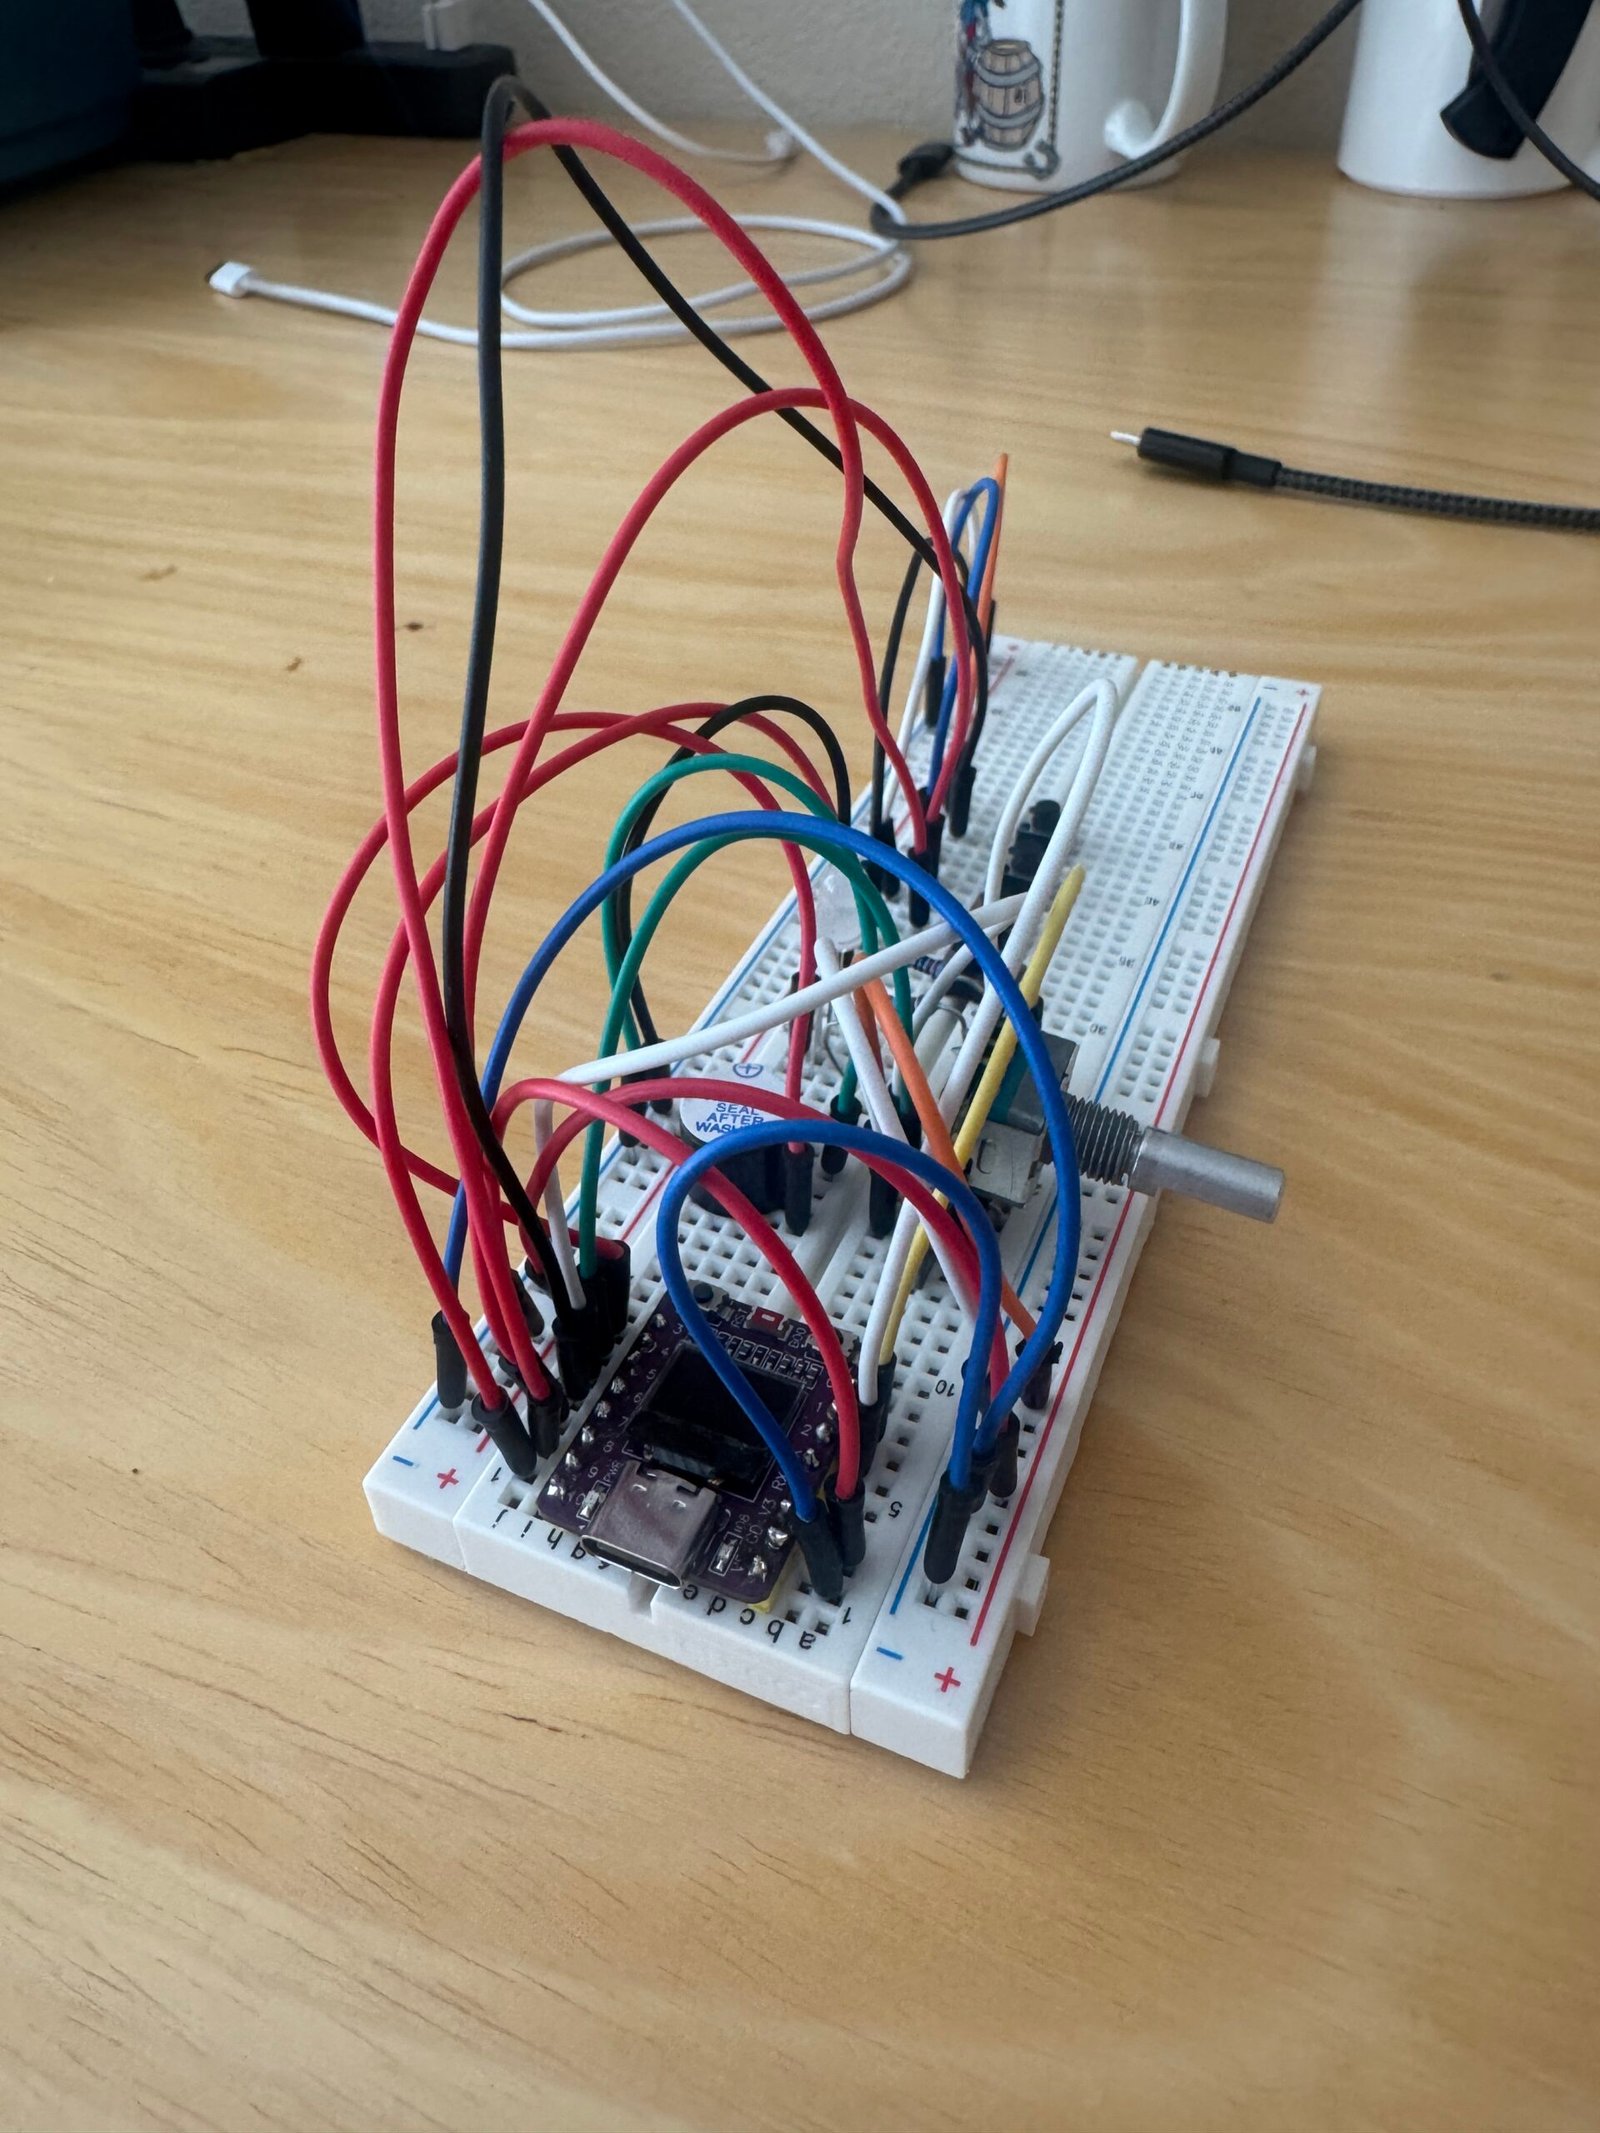
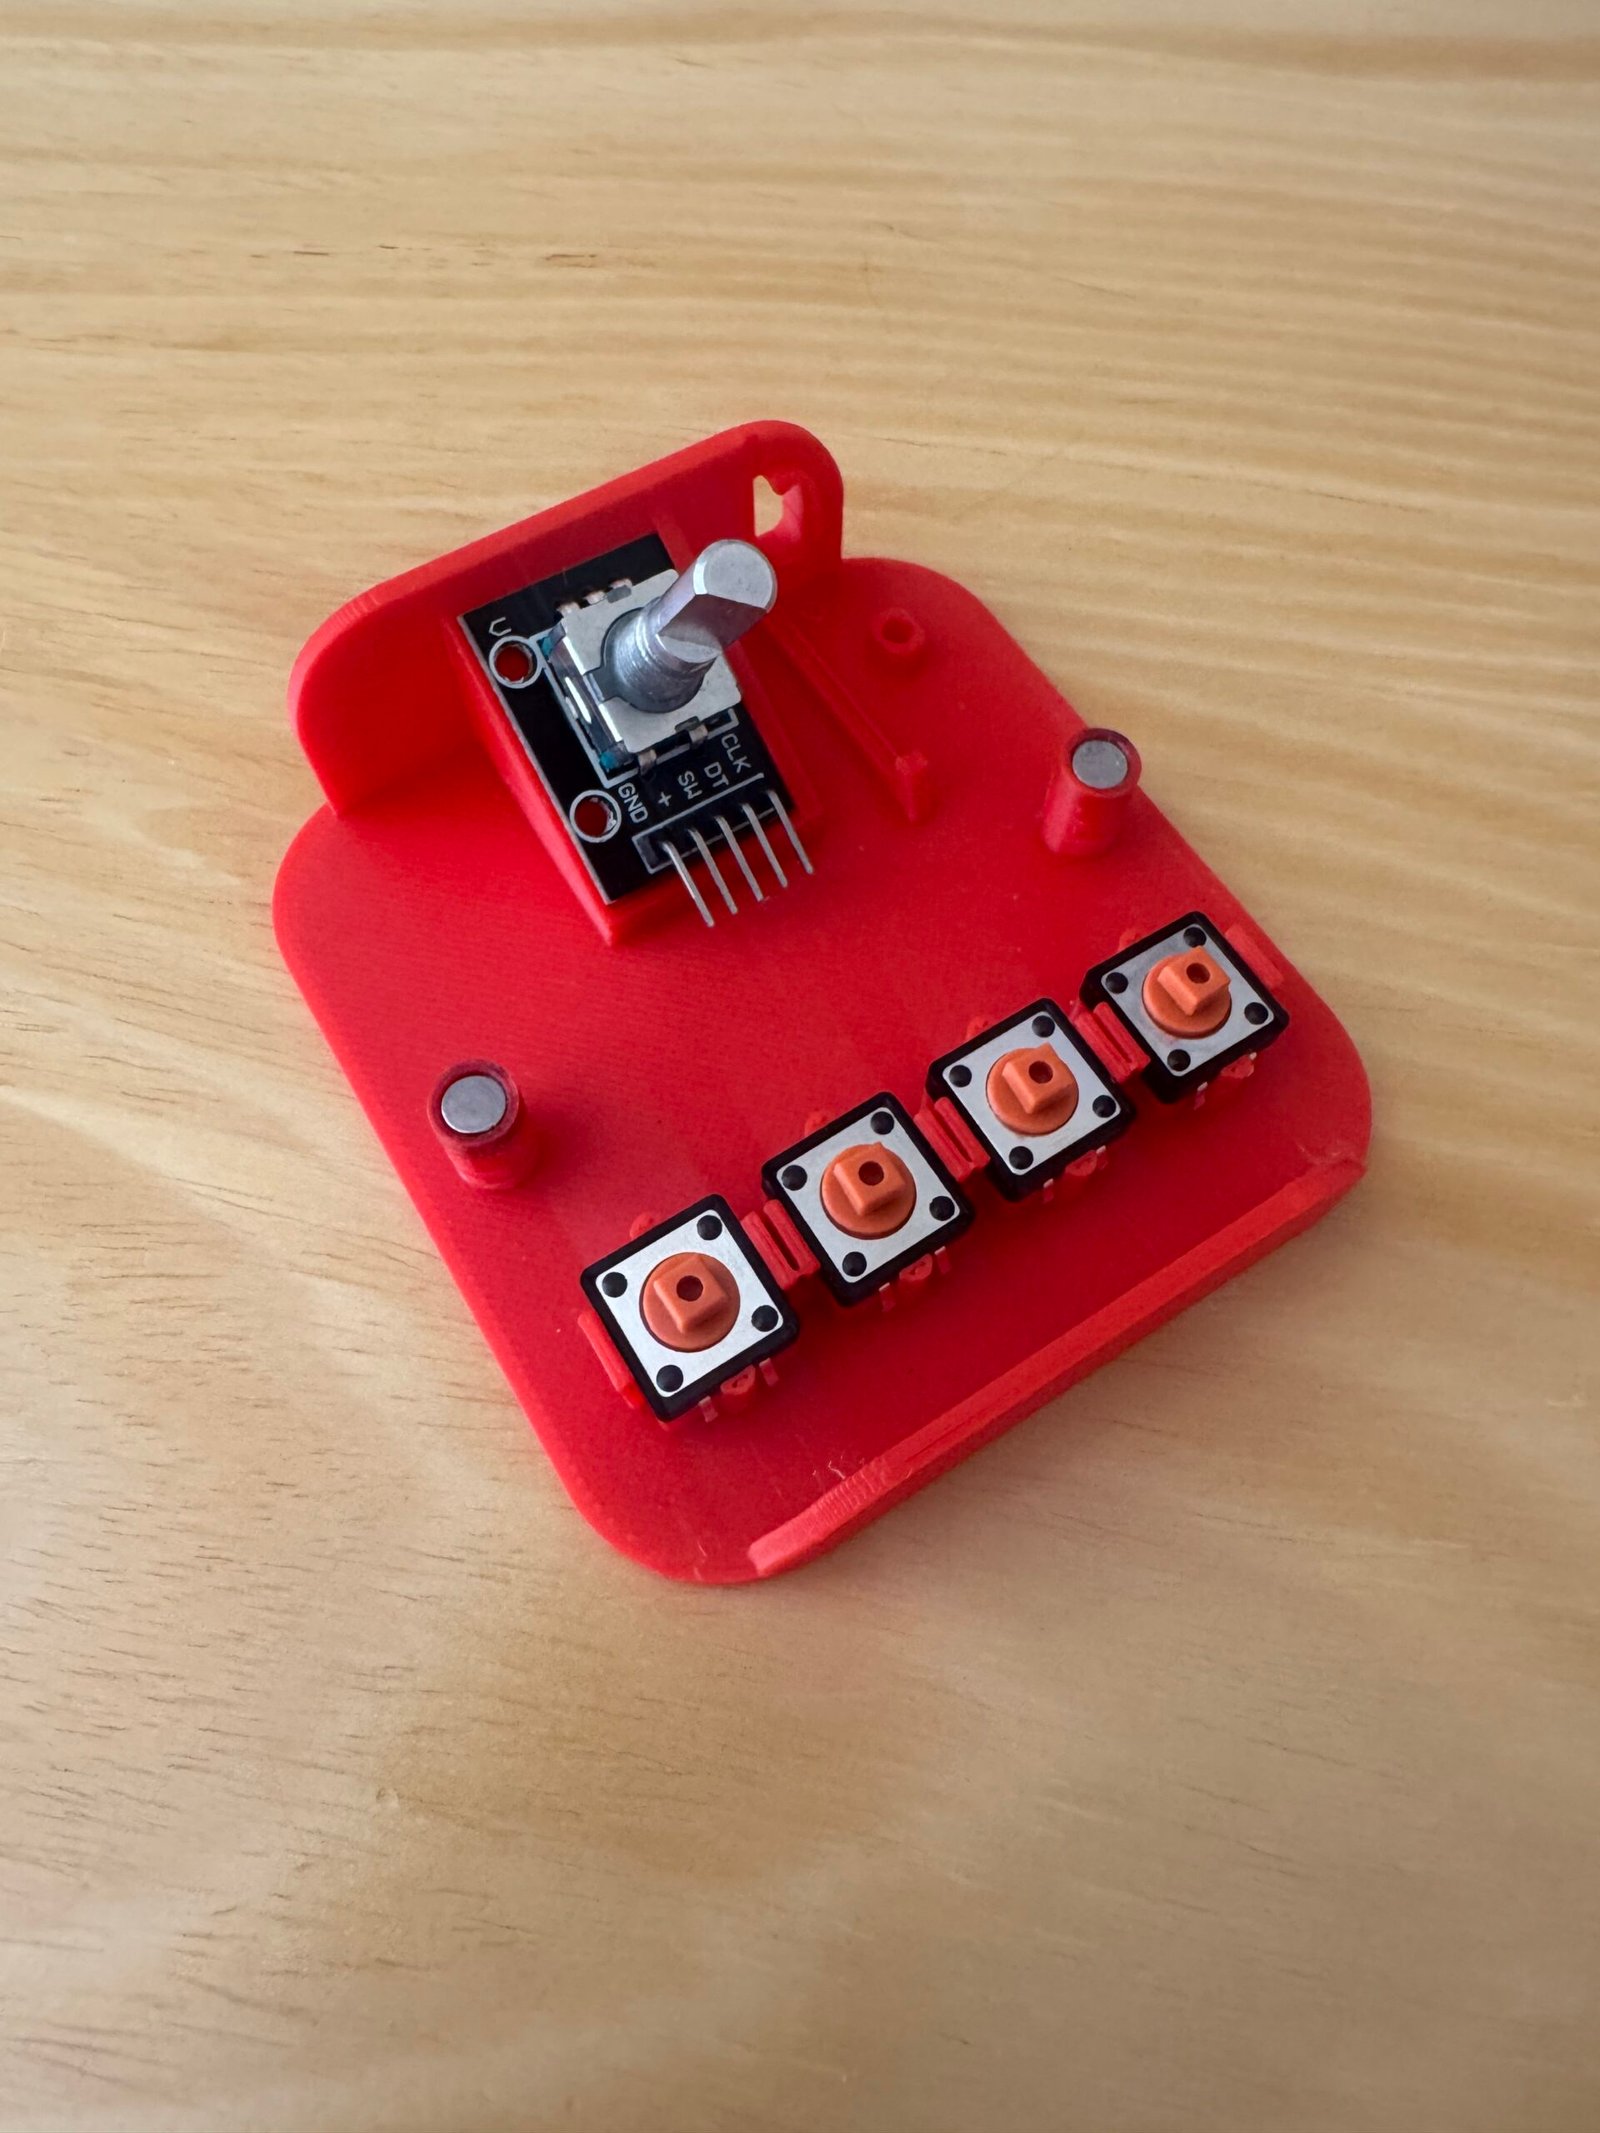
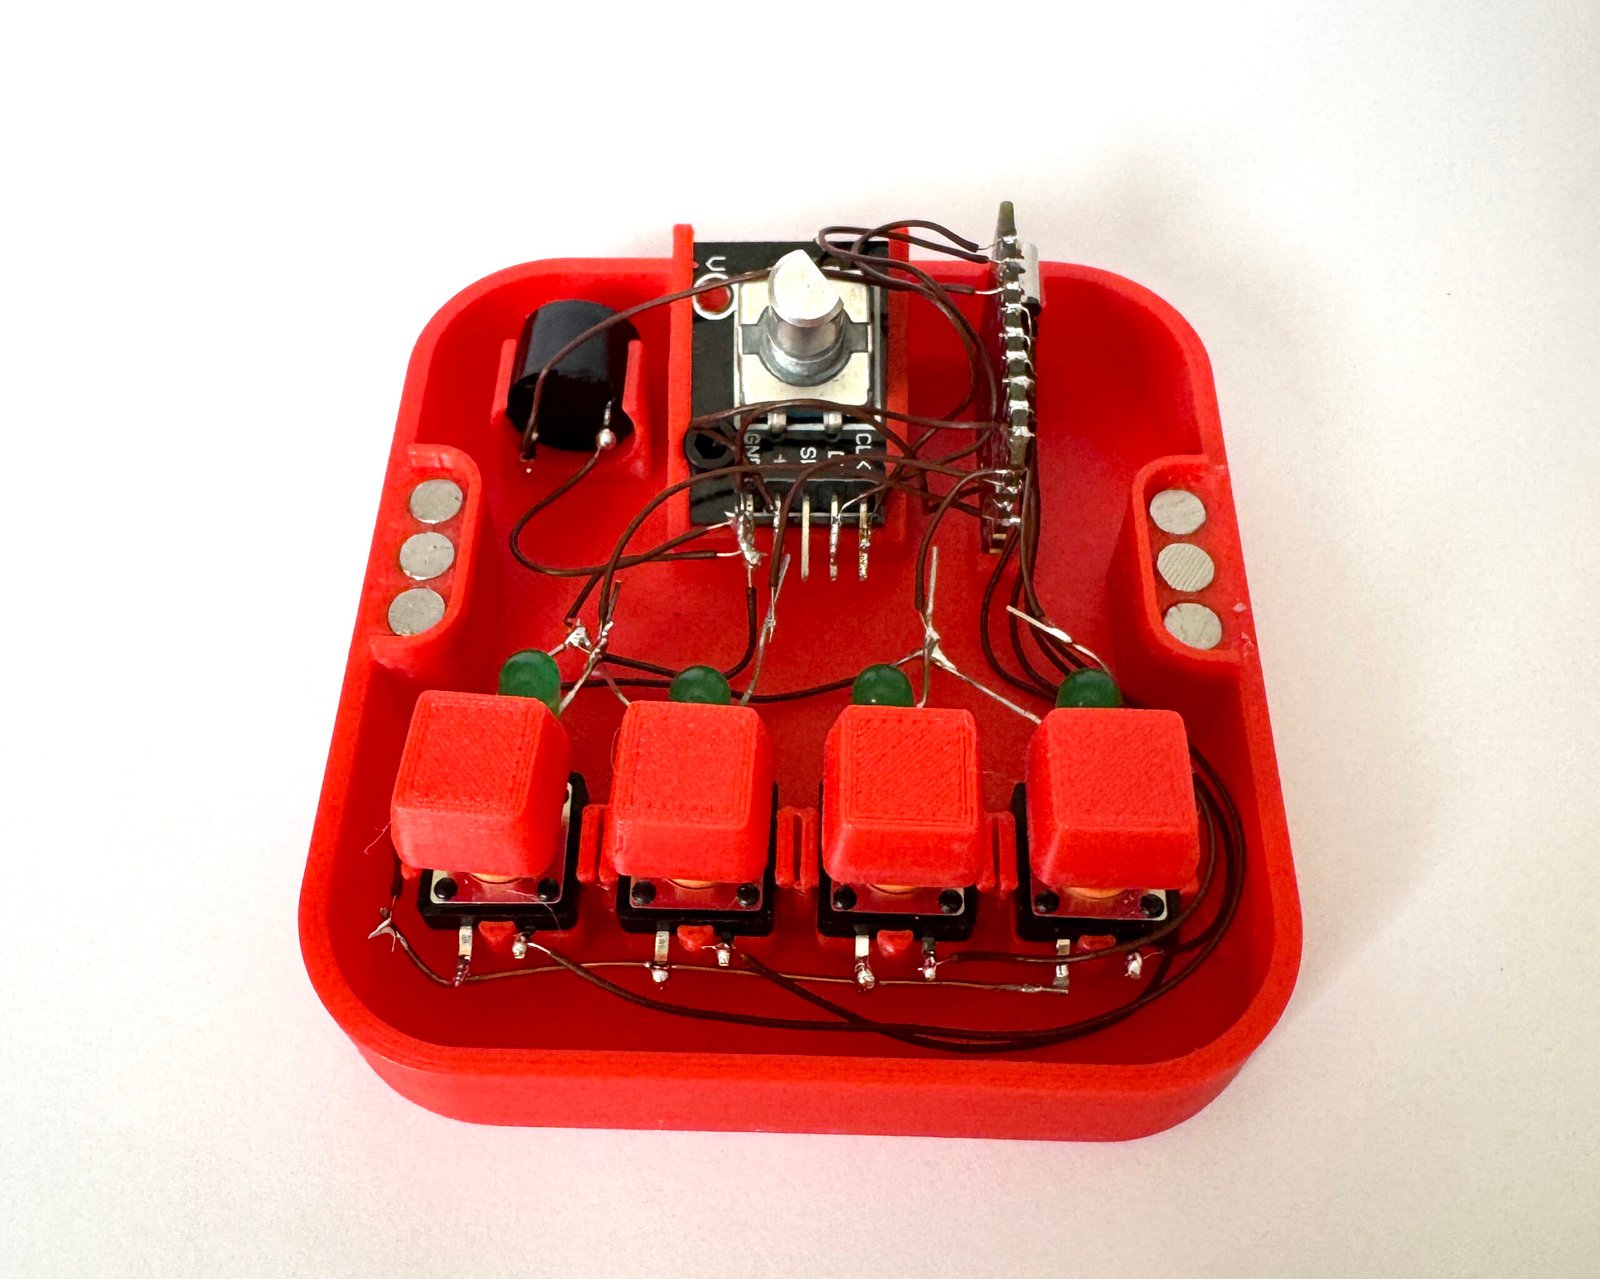
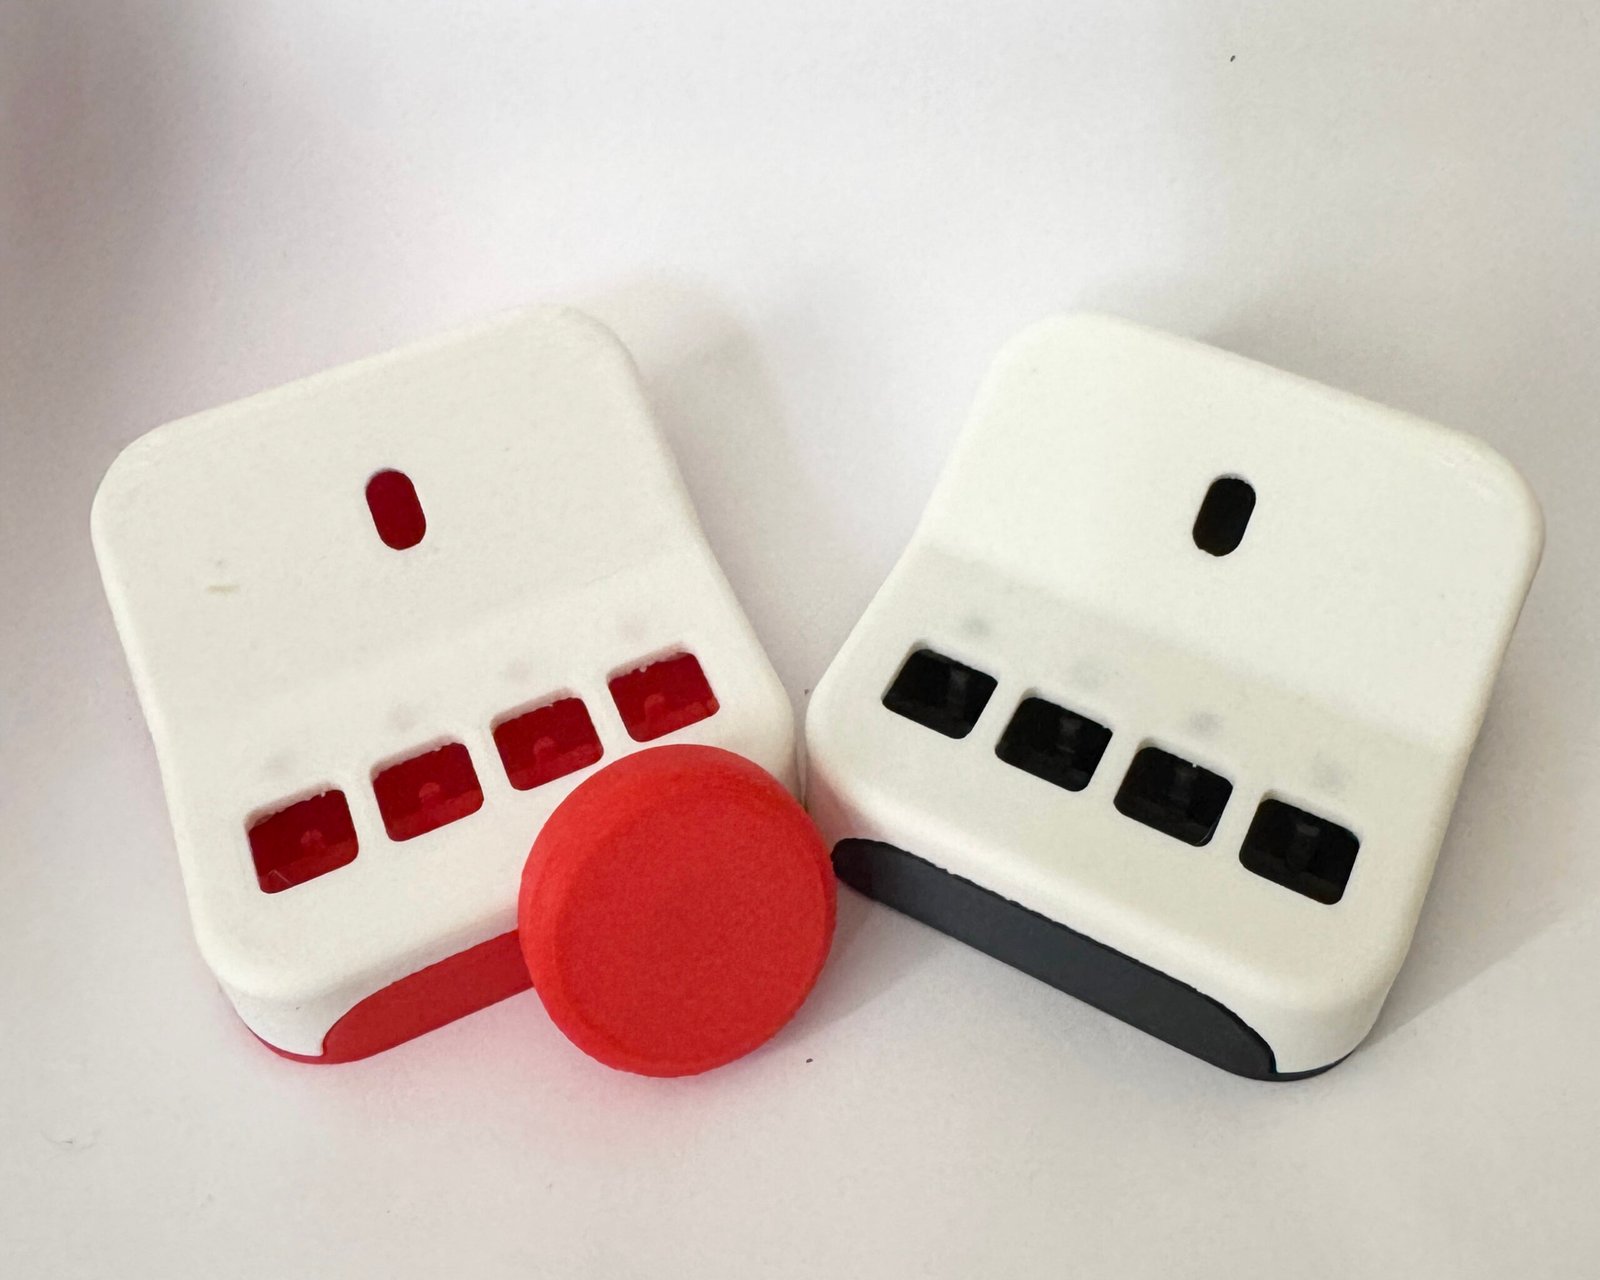
A physical typography picker( kind of like a macropad?)  with a rotary encoder and a couple buttons.

  • Create some kind of program where you can type in a word/sentence
  • You twist the rotary encoder (with a 3D-printed knob) to cycle through different fonts(Ideally it pulls from something like Google Fonts?)
  • When you find a font you like, you press a button to save it.
  • An LED lights up to show that the font has been saved.
  • You can use the buttons to cycle through your saved fonts, compare them, and figure out which one works best.
  • 3d print or laser cut an enclosure

Possible expansions (later):

  • Font pairing
  • Color palettes

Cat Toy

My cats push all of their toys under my cabinets and fridge!

What I’m imagining:

  • A small cat toy that reacts to light.
  • When it’s in the open and the cat plays with it (covering the sensor), it moves.
  • When it gets pushed under a cabinet or fridge and it’s dark, it starts moving on its own and rolls back out into the light.

How this could work:
A small microcontroller could read data from a light sensor (photoresistor or light sensor). When the sensor detects low light (meaning it’s under something), the microcontroller triggers a motor to make the toy move or roll. When light is detected again, it can stop or switch into a different play mode.

Notification System for Remote Work

As a remote worker, I sometimes miss work notifications when I step away from my desk! 😉

Concept:
The project consists of a set of small devices placed throughout my apartment. Each device connects wirelessly to a my work computer and reacts whenever a work-related notification occurs. This makes notifications visible anywhere in the space, without demanding immediate attention.

How it works:
Create a program on the work computer listens for notifications from applications like Teams, email, or calendar events. When a notification occurs, the program sends a message over to each room device.

Each device contains a microcontroller and either:

  • LEDs for color-based signals, or
  • LEDs plus a small screen for limited previews

The devices interpret the incoming message and display:

  • Which app the notification came from (color or icon)
  •  Urgency level (light pattern or animation)
  •  Optional preview such as sender name or first few words

Final Design

Items Used

  • Arduino Nano
  • 4 Buttons
  • Rotary encoder
  • Buzzer
  • 4 LEDs

The Process

  • Got an idea and figured out exactly what I wanted it to do.
  • Gathered all the parts I needed.
  • Breadboarded everything to make sure it worked and wrote some simple test code.
  • Figured out how to host the font program on my laptop. HTML ended up being the easiest way. Started with basic code to make sure it worked.
  • Used AI to help get the Arduino code and HTML/CSS/JavaScript working together.
  • Once it was functioning, redesigned the HTML to look nicer.
  • Modeled all the parts in Rhino and designed an enclosure to fit them.
  • Did several 3D printing tests:
    • First print: Forgot a spot for the buzzer, LED holes were too bright, snap-fit tolerances were off.
    • Second print: Added a buzzer spot, removed LED holes, adjusted tolerances, but still didn’t look right.
    • Third print: Redesigned the base, switched to magnets for easy top removal, added placements for magnets.
  • Went through two versions of the turning wheel. The first was too simple, so added more details in the second.
  • Soldered all parts together inside the enclosure (very hard)
  • Everything worked perfectly on a Windows laptop (Mac didn’t cooperate)

What Worked

  • Successfully got it to do what I wanted it to do
  • Rotary encoder scrolls through fonts smoothly
  • Buttons save fonts
  • Long hold on button unsaves a font
  • The buzzer was a last minute addition that actually ended up being really helpful so you know when something saved or unsaved
  • 4 LEDs give visual feedback for button states
  • 3D printed enclosure turned out pretty good overall
  • Held together nicely using magnets which made it easy to open and close without screws
  • Soldering was tough because the enclosure was so compact and everything had to fit really tightly together. Somehow managed to make it work

What Didn’t Work

  • Couldn’t get bluetooth to work
  • Macs SUCK. I wanted to throw it out my window. It would not work on my Mac at all, but worked perfectly on Windows. That ended up being a huge time sink trying to troubleshoot something that wasn’t even really my code.
  • Couldn’t load as many fonts as I originally wanted. When too many fonts were added it started lagging when scrolling through them
  • Coding is hard
  • Went through 2–3 test prints of the enclosure to get the tolerances right. I kept having issues where the top and bottom pieces had a crack/gap between them. Eventually had to simplify the design so the parts would actually fit together properly
  • One of my first prints of the top had tiny holes that only had one layer of filament because I thought it would diffuse the LED light and look cool. The LEDs were way too bright, so instead of glowing softly they just blasted light through the holes. Ended up removing that feature completely
  • First print didn’t have a spot for the buzzer, which meant redesigning the internal layout and reprinting

Plans to Expand / Improve

  • Use a better rotary encoder. One that clicks/snaps into each position more clearly
  • Make it Bluetooth so it doesn’t need to be plugged into a computer
  • Design a better / cooler looking enclosure
  • Figure out a way to load more fonts without the lag when scrolling
  • Maybe add a slider or another control to adjust the size of the text shown on screen